MetaData
Metadata is data that describes other data. Meta is a prefix that -- in most information technology usages -- means "an underlying definition or description." Metadata summarises basic information about data, which can make finding and working with particular instances of data easier.
The use of Metdata in FieldTwin allows you to enable DATA DRIVEN DESIGN in your pre-engineering phase when designing field layouts. Metadata allows you to build or link your own data model to your private Asset Library, the Generic library or as Virtual Assets.
This is especially useful for providing equipment and costing options while designing the field. E.g. by defining metadata your users can then select various equipment configurations with corresponding options and link them to your VendorID, WBS, cost specifications etc.
Metadata API Support
Everything you can do with the Meta Data Editor you can also do through the FieldAP REST API so you can programatically configure everything. You can read more about the API here in the API DOCS
Metadata Definitions
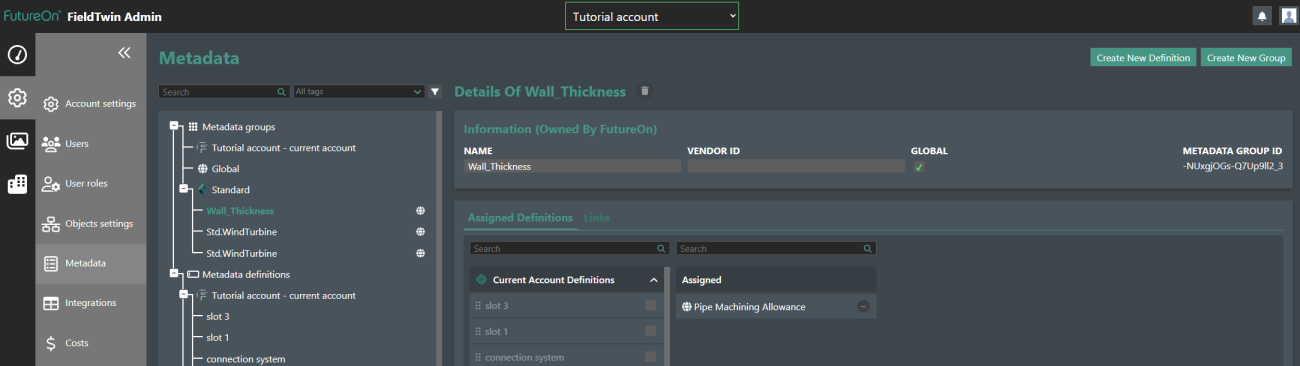
You start out by defining your Metadata in the Metadata screen. You will find this in FT Admin by selecting "Metadata" as shown below:
The UI allows you to define your various metadata attributes with a wide range of data types, units, and input options for user selection on assets, layers, wells, connectors and connections. Furthermore the metadata are highly customisable, and supports dependencies, filters, tags and more.
Create New Definition
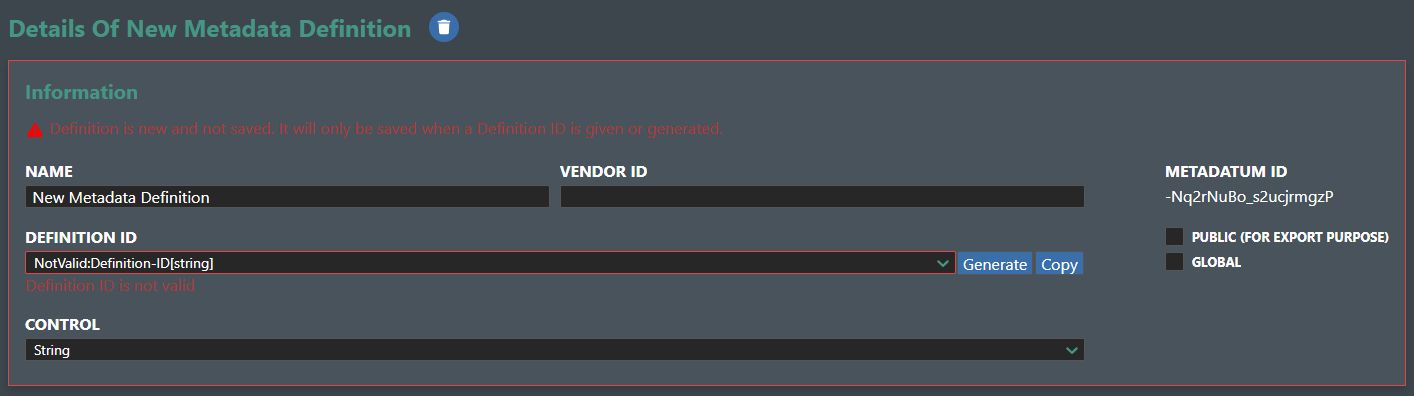
Press the +Create New Definition button and the following "New Meta Definition" entry section will appear in the list below and the definition panel will be shown to the right as shown below:
-
ID - This is the unique ID (identifier) for this metadata, and typically is used as a reference for metadata API operations. It is a Read Only value.
-
Definition ID - This is the metadata definition ID. After you have selected an existing ID or filled in the Name field below it, you can press the Generate button and the new ID will be created.
-
Name - Specify the name of your new metadata entry in this field. Do this before you press Generate.
-
Vendor ID - You can also assign an optional alphanumeric Vendor ID of your choosing, which can be useful for API integrations etc.
-
Control - Drop down list of the available data types for the new Metadata you create.
-
Public (For Export Purpose) - If you want the Metadata definition created here to be publicly available when exported and shared to other parties.
-
Global - Check if this definition is global for all accounts.
-
DefinitionId - Press this button to generate the new Definition ID for the metadata you are creating. Note! The Account Identifier must be defined first under Account Settings > General.
Control Data types
This setting allows you to define the data type for the metadata you are creating as well as to assign it to Group or Sub-Group.
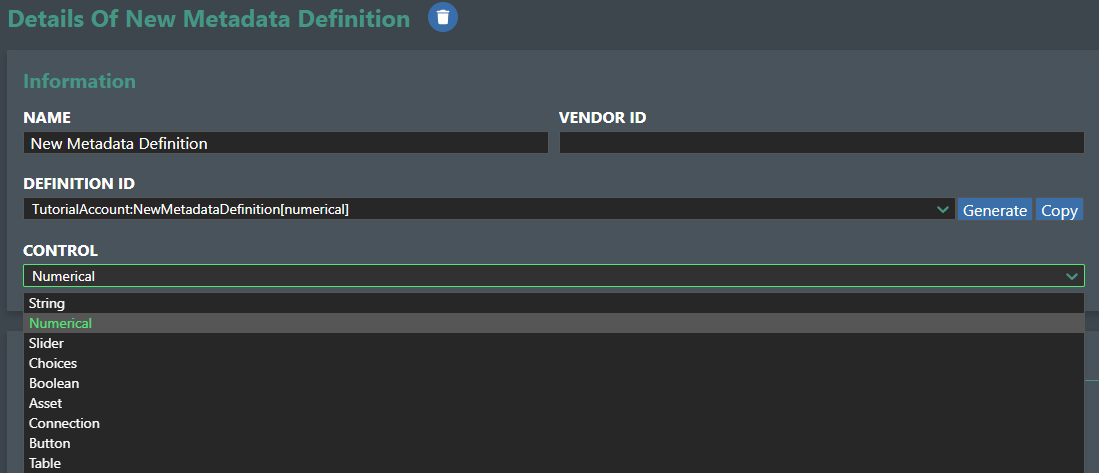
The available data types are as follows:
| Data Type | Description |
|---|---|
| String | Alphanumeric string |
| Numerical | Numerical value |
| Slider | Numerical value |
| Choices | List of alphanumeric options |
| Boolean | True or False |
| Asset | Relationship |
| Connection | Relationship |
| Button | Invokes URL |
| Table | Table Entry |
String
This is an alphanumeric text string data type:
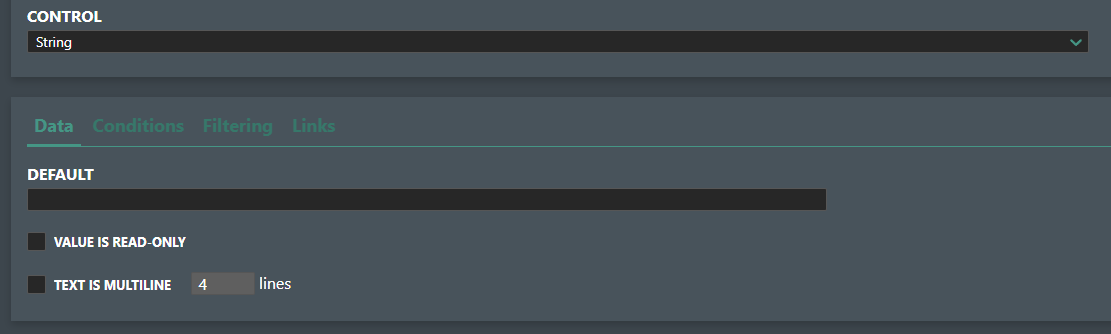
You have the following available settings:
Default - This allows you to enter a default value e.g. a text string that describes the input you are looking for from the user.
Value is read only - Check this option if the text field should be read only e.g. no user input.
Text is multiline - Check this option if you want the text field to be comprised of multiple lines.
If multiline, number of lines to display - Enter the number of text lines you want to display.
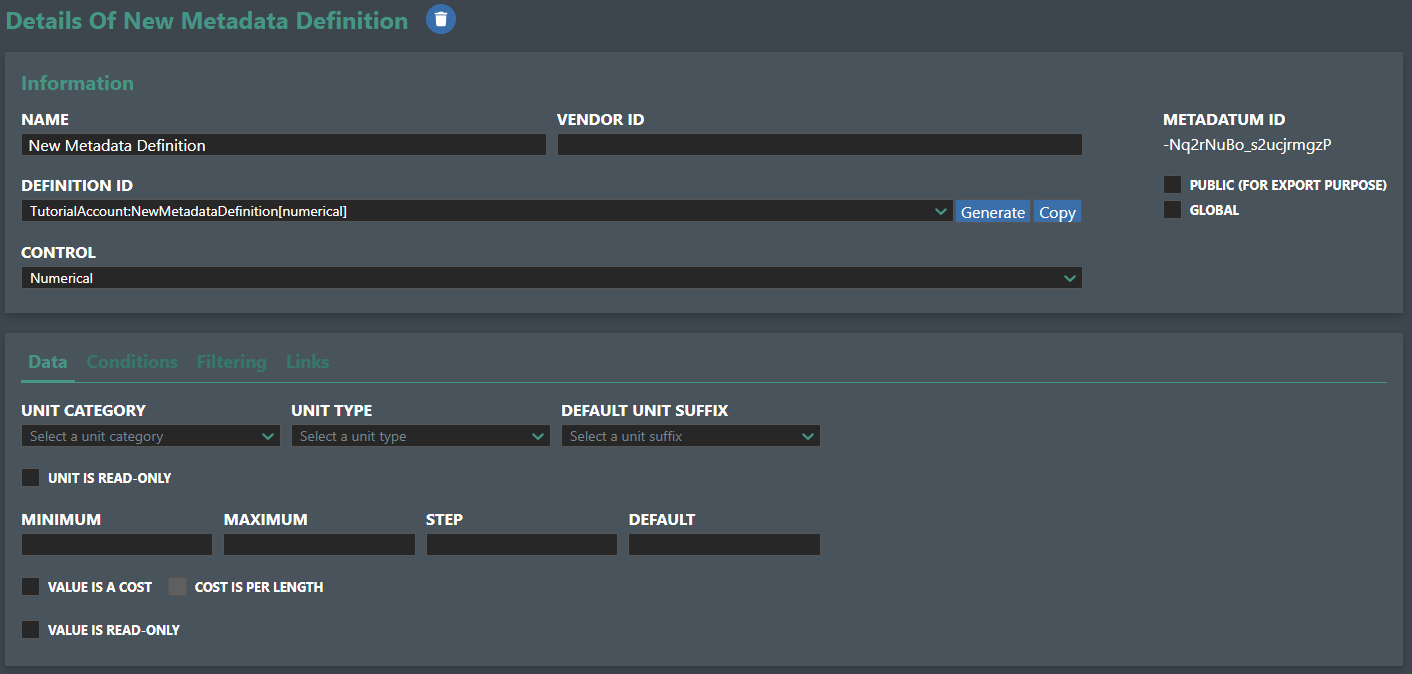
Numerical
This is a numerical input field where you define a Minimum, Maximum, and a Default numerical value. You can define the Units to be used for the field. Select a Unit category first and then the available Unit type selections available will vary based on the category selected.
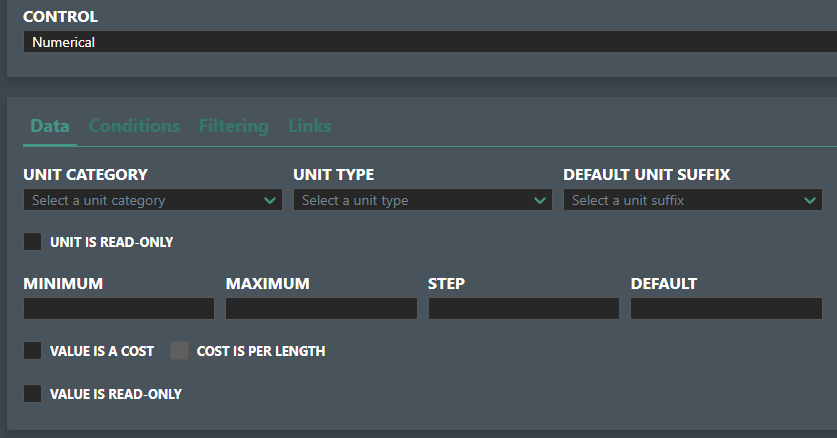
Unit Category - Select the unit category you want to use from the drop down list. Read about the available Unit Categories
Unit Type - Select the unit type you want to use from the drop down list. Read about the available Unit Categories
Default Unit Suffix - Select the default unit suffix you want to use from the drop down list. Read about the available Unit Categories
Unit is read-only - Check this option if the user is not allowed to change the value.
Minimum - Set the minimum numerical value allowed for the input field.
Maximum - Set the maximum numerical value allowed for the input field.
Step - Set the numerical step increment for the unit.
Default - Set the default numerical value to pre-populate the input field with.
Value is a cost - Check this option to have the value computed in the cost equipment module.
Value is read-only - Check this option to have the numerical input field to be read.
"Cost is per length" - Select this option if the numerical value is to be used in a cost per length calculation e.g. cost per meter of a pipeline.
Slider
This will display a horizontal slider UI element that gets defined with a minimum, maximum value and the step value of the slider You can also check the the Value is a cost option so it will get computed in the cost equipment module. And you can define the numerical value to be used in a cost per length calculation by selecting the "Cost is per length" option.
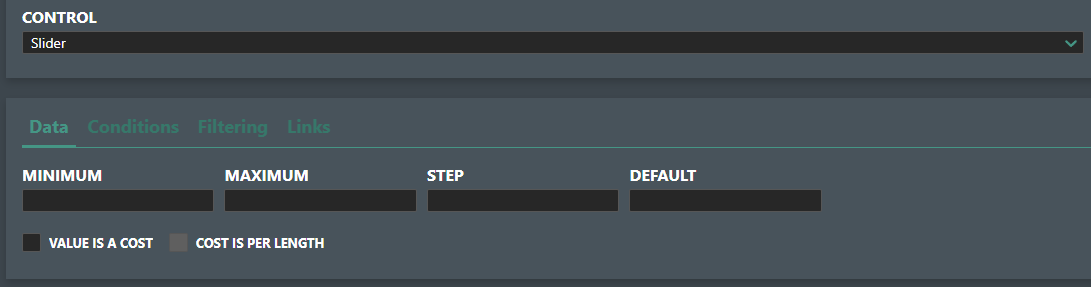
Minimum - Set the minimum numerical value for the slider range.
Maximum - Set the maximum numerical value for the slider range.
Step - Set the numerical step value to increase or decrease the slider control with.
Default - Set the default numerical value for the slider control.
Value is a cost - Check this option to have the slider value computed in the cost equipment module.
"Cost is per length" - Select this option if the slider value is to be used in a cost per length calculation e.g. cost per meter of a pipeline.
Choices
This is a list of choices you define (alphanumeric or numerical) that will be presented to he user for selection.
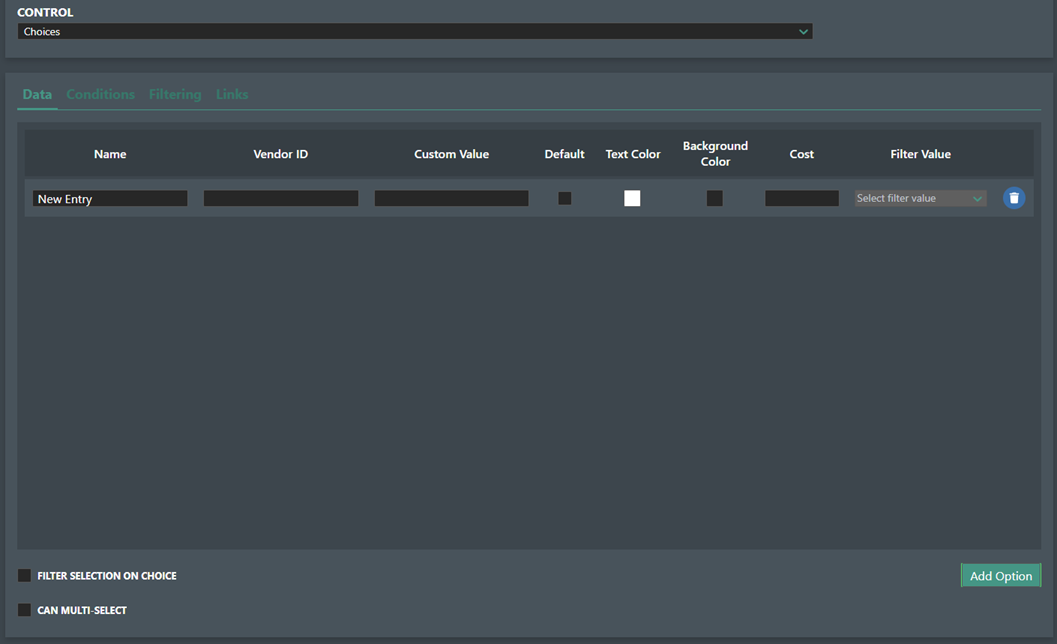
Add Option - Press this button to add a new entry to the choices list.
Name - Set the name definition of your choice entry e.g. Injection.
Vendor ID - Set the choice entry Vendor ID if needed.
Custom Value - Use this field to specify a custom value. This can be useful if you want to associate a value with a string and fetch the number through the API to be used in e.g. simulations.
Default - Select one of the created Choice option as the default selection.
Text Color - You can define a choice color to illustrate to the user if this choice is safe e.g. green or risky e.g. red.
Background Color - You can define a choice background color to illustrate to the user if this choice is safe e.g. green or risky e.g. red.
Cost - Enter a numerical value that will be computed in the cost equipment module.
Filter Selection on Choice - Check this option if you want to apply a filter to the choices that will displayed, based on other selected metadata.
Filter Value - Select the relevant metadata selection that should be used for filtering then select the option for display. If multiple options are selected it will display as soon as one condition is met.
"Can multi-select" - Check this option to allow for multiple options to be selected by the user.
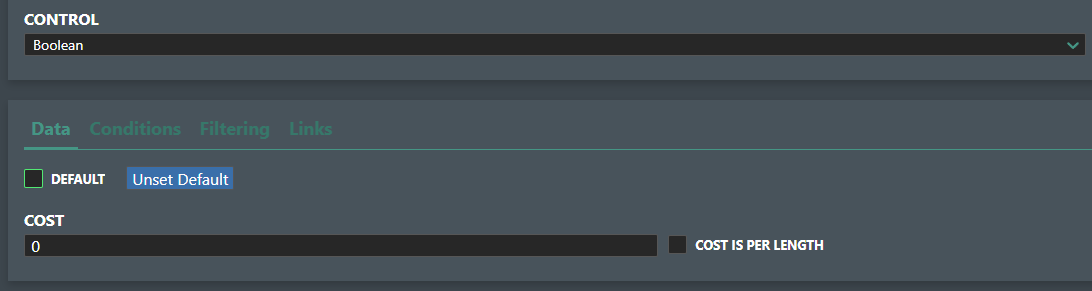
Boolean
This will present the user with a TRUE/FALSE checkbox with the possibility to have a "Cost per length" attached to it thats get computed in the cost equipment module. The Default checkbox indicates the default boolean state e.g. if checked the option is TRUE by default.Unset default button allows to reset the default value boolean value.
Asset
This is a meta data type that makes it possible for you to link another asset to your object. As an example you make a data type called slot 1 in a 4 slot template - you can then choose asset as data type, and in the project you link a XMT asset into the slot. Then the metadata for the XMT will also show up in your meta data editor in the project and every asset linked will then be computed in the cost equipment module.
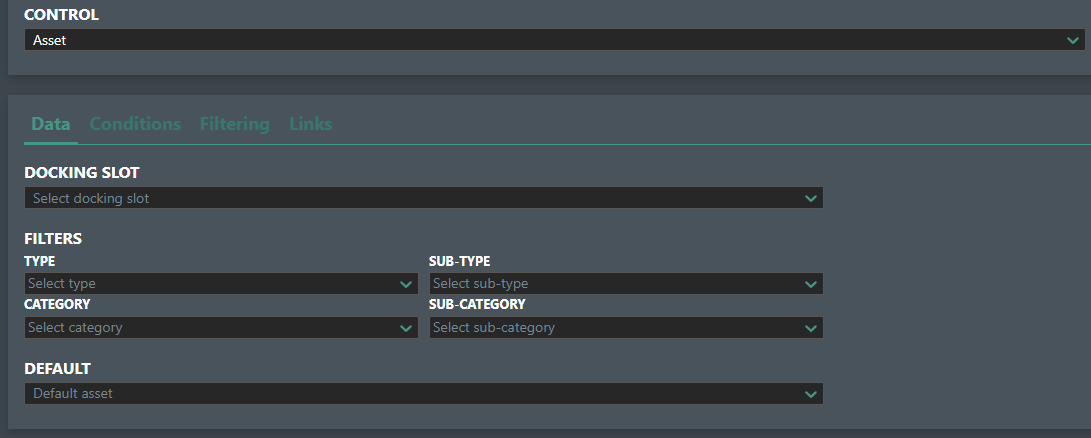
Docking Slot - Assets (Models) supports connections with other assets (SmartModels) if they are defined as such. You can select the docking slot here if configured for this asset.
The Asset data type also has a Filters section, where you can preselect the following filters;
Type - Select the asset type from the list which is comprised of; vessel, structure, virtual, submerged, and onshore.
Sub type - Select the asset sub type from the list which is comprised of; SPS, piping, Host, rig, other, umbilical, SPP, vessel, and installation aids.
Category - Select the asset category from the list which is comprised of; XMT, ITS & Template Structures, Riser & Riser Base, Valve, Pipeline and Pipeline Assets, Hosts, Onshore Facility, Terminal, Manifold, Rig, Wellhead, Subsea Distribution, Subsea Processing, Vessel, TBE, Cover, Anchors, Mattress, Controls, Pipeline Crossing Support, Pointer/Link holders, and Host.
Sub Category - Select a sub category from the list if one is defined.
Default - Select the default asset type from the list for this Metadata definition.
Connection
This is a meta data type that makes it possible for you to link another connection to your object. Typical usage is when defining Bundles or Pipe in Pipe. You then link the category you wish the user to be able to add into the carrier pipe
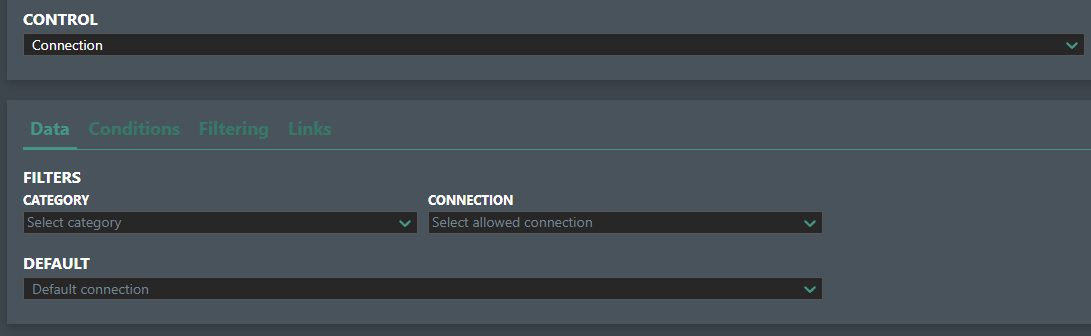
Category - Select the connection category from the list which is comprised of; Umbilical, Production, Water Injection, Gas Injection, Gas Lift, Electrical Lead, Hydraulic Lead, MEG, Methanol, Fiber Optic Lead, Service Line, Cable, Power Cable, Bundle, Mooring, and Pigging.
Connections - Select the connection allowed connection type from the list which is comprised of; Umbilical, Oil Production, Water Injection, Gas Injection, Gas Lift, Electrical Lead, Hydraulic Lead, and MEG.
Default - Select the default connection type from the list for this Metadata definition.
Button
Allows you to place a button with the text specified in the Caption field into the Meta data editor. You can then assign an URL in the Action URL field that typically invokes a call to an external service/server for launching a simulation, calculation, or some other operation with your own or 3rd party software.
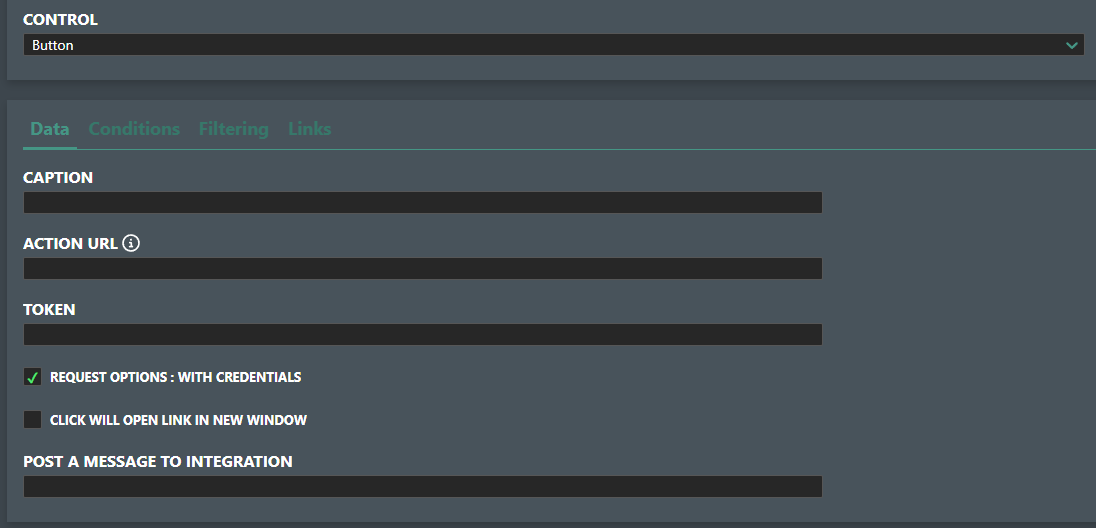
Caption - Enter the text for the button text.
Action URL - Enter the URL that will be invoked when pressing the button with any parameters that are defined as follows:
The action URL can be comprised of the following parameters:
| Parameter | Definition |
|---|---|
| %account% | Account ID |
| %project% | Project ID |
| %subProject% | Sub project ID |
| %id% | Selected element id (the one the metaData is linked to) |
| %type% | Selected element type ('stagedAsset', 'connector', 'connection') |
Example : https://myserver/query/%account%/%project%
Token - Enter a token to pass along if needed.
Request Options: With Credentials - Check this to pass along credentials.
Click will open link in a New Window - Check this option if you want the button to open the link in a new browser window.
Post a message to Integration - Issues a Post message if the action URL is to an integration.
Table
This data type allows you to create a table layout for user data entry.
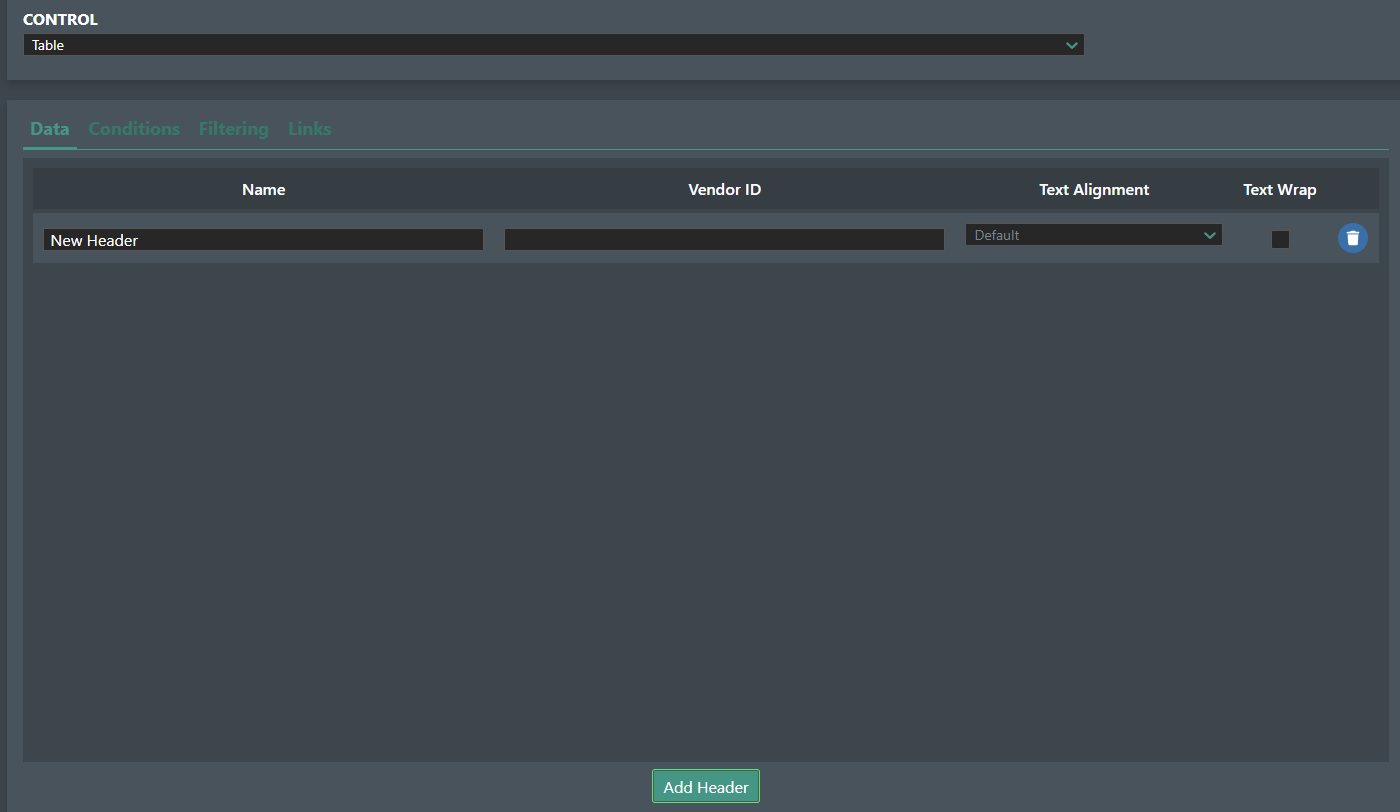
+Add Header - Click this button to create a new table column.
Name - Enter your column name in this field.
Vendor ID - Enter an optional VendorID in this field.
Text Alignment - Select how you want the text aligned from the list; default, left, center, and right.
Text Wrap - Check this option if you want the text to wrap in the column.
Remove - Click the trashcan icon to delete an entry.
Conditions
This section allows you to add logic to the metadata configuration.

+Add a Condition - Press this button to add a condition, and the input area will be expanded.
The Select a dependency drop down list will show all the metadata you have defined so you can select the one you want. Then select if the condition should be Equal or Not Equal to the values or options you have defined for the metadata. Use the Add a condition button again to create multiple conditions.
Remove Condition - Press the trashcan icon to remove the created condition.
Filtering
Filtering of metadata definitions using tags, If you have a long list of metadata definitions, you can now filter by tags.
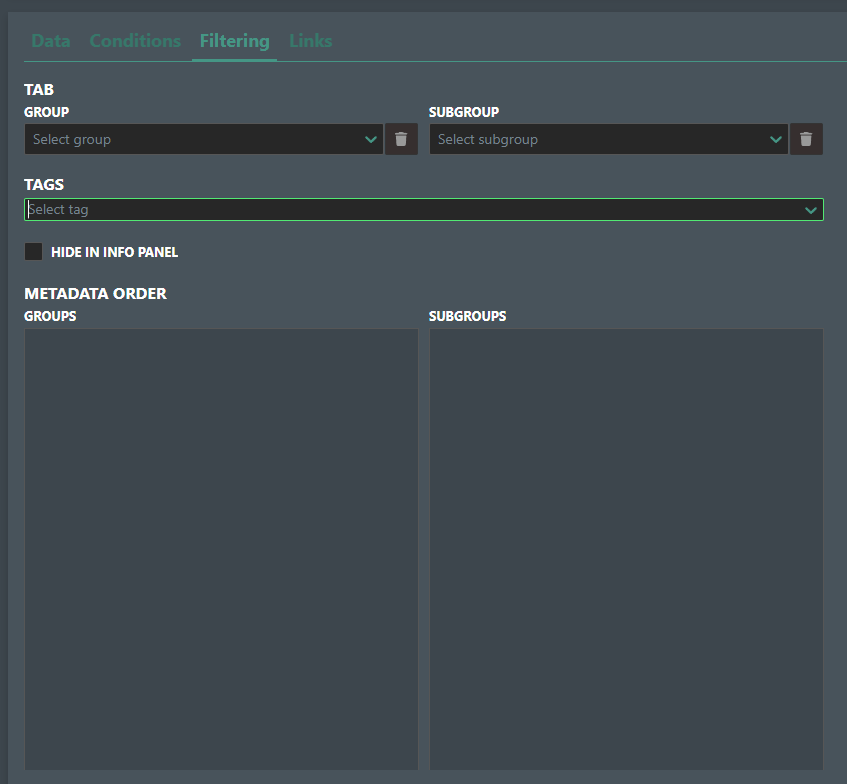
Tab Group - You can select the defined metadata tab groups you want to filter on.
Sub Group - You can also select the sub group you want to filter on.
Tags - Select the tags to filter on in the drop down list.
Hide in Info Panel - Check this box to hide it in the info panel.
Metadata Order Groups - Displays the order of the defined Metadata groups.
Subgroups - Displays the order of the subgroups.
Links
This will display a list of any links between Metadata if defined.

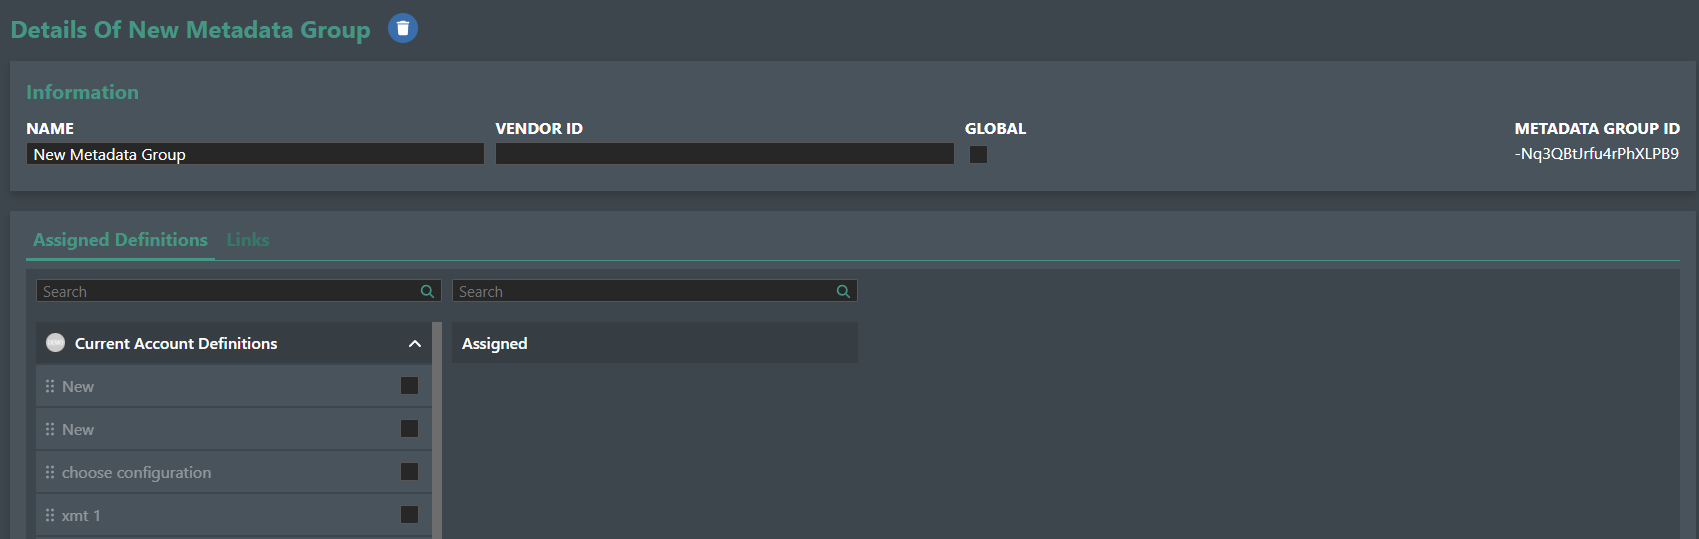
MetaData Groups
Grouping Metadata allows you to assigns sets of metadata to an asset, connection etc in one operation. Click on Add new Metadata Group in order to create a new metadata group then select the definitions to make up the group.