Users
To add new users this can either be done by your customer success manager or your IT Admin, they can assign the correct user license types please see our Organization/IT Admin docs here to find out more.
User License Types
Please see the user license matrix below for an overview of the various license types.
Feature Matrix
| Features | VIEW | PRO | PRO Design | Partner |
|---|---|---|---|---|
| VIEW Features | x | x | x | x |
| Geometry | x | x | x | x |
| Viewpoint selector | x | x | x | x |
| Water opacity control | x | x | x | x |
| 2D/3D, subsurface, subsea/topside navigation with zoom settings | x | x | x | x |
| Ruler functionality | x | x | x | x |
| Flythrough camera control | x | x | x | x |
| Animations | x | x | x | x |
| Well visualization | x | x | x | x |
| Legend | x | x | x | x |
| PRO Features | x | x | x | |
| Integrations | x | x | x | |
| Scenario selection | x | x | x | |
| Tree view navigation - read/write | R | R/W | R/W | |
| Select/multiselect and hide/unhide objects | x | x | x | |
| Data export | x | x | x | |
| Connection profile | x | x | x | |
| Support | x | x | x | |
| PRO Design/Partner Features | x | x | ||
| Add and delete assets | x | x | ||
| Create/delete/import connections and wells | x | x | ||
| Import geo-spatial data, GIS data (WFS,Mapserver/Rule Engine) | x | x | ||
| Create WMS and Mapserver | x | x | ||
| Edit metadata values | x | x | ||
| Create shapes and Add object shapes to assets & connections | x | x | ||
| Add / visualize data along pipelines & wells | x | x | ||
| Flythrough video recording | x | x | ||
| Hi res pipeline data simplification | x | x | ||
| Create viewpoints | x | x | ||
| Import images | x | x | ||
| Pro Support | x | x |
View
View Users are a new class of users included in all field or partner licenses without additional cost. This allows controlled access without risking data leaving the organization answering concerns associated with sending URL links of project snapshots. They can open projects but are not authorized to select, edit, remove data or use integrations.
View access is typically of benefit to engineers and management in energy organizations that have passive access for information and decision-making purposes during project delivery.
They can open public projects/projects they are invited into but not interact with data, by either selecting, editing, removing data or view/use integrations.
Key Features:
- View project list in Dashboard
- Open Public projects
- Open Projects invited into
- Select Scenario
- Read descriptions about current integrations
- 2D/3D Navigation only (no selection)
- Viewpoint Selection
- Water Opacity settings
- View Reservoir
- Zoom Settings
- Ruler measurement
- Subsea/topside Switch
- Flythrough camera control
- Animations
- Well visualization
- Legend
PRO
PRO Users can open projects, view and interact with data by selecting objects on stage or in the tree view. PRO Users have inexpensive access where there is no requirement to add or modify data or modify values.
Crucially PRO Users can access available integrations and when the integration is authorized for ”edit rights” in projects, the integrations can modify data via the API.
PRO Users are generally part of Technical teams contributing expertise to projects and making change requests to Field Development teams based on their models from applications inside and outside FieldTwin.
Pro Users can open public projects/project they are invited into, they can view data and interact with the data by selecting objects on stage or in the tree view. They cannot add or modify data on the stage or modify values in tree view.
Key Features:
- View project list in Dashboard
- Open Public projects
- Open Projects invited into
- Access to available integrations
- 2D/3D Navigation
- Tree view Navigation
- Select Scenario
- Hide/unhide objects
- Select/multiselect
- Export Data
- Connection Profile
- Standard Support
PRO Design
PRO Design users can open existing projects and create their own projects with unlimited scenarios. They have the ability to import, add, edit, remove, and delete data.
PRO Design users are typically Field Development engineers that create digital twins of proposed and existing field designs from greenfield to brownfield. This facilitates studies in unlimited scenarios for field creation, expansion and de-commissioning. PRO Design users are the primary digital collaborators with EPCs during the bid and delivery project phases.
(Image of view port with Pro Design License)
Key features:
- Create projects and scenarios
- Clone projects and scenarios
- Add assets / Connections
- Import Geospatial data, GIS data, Connections and Wells
- Create Local Parent/Child link
- Edit Metadata Values
- Create Shapes
- Add data along Connections and Wells
- Flythrough Video Recording
- Create Viewpoints
- Import Images (GeoTiff and common images)
- Export Data
- Navigate in 2D/3D
- Navigate in Tree view
- 24 x 7 Support
More details of each of these features can be found here.
Partner
Partner users have the same rights as Pro Design users. Typically they are Field Development engineers that create studies of proposed and existing field designs from greenfield to brownfield. This facilitates studies in unlimited scenarios for field creation, expansion and de-commissioning.
Partner users can open existing projects and create their own projects with unlimited scenarios. They have the ability to import, add, remove, and delete data.
Partner users are the primary digital collaborators with operators during the bid and delivery project phases.
User settings
Under the Users setting tab you as an Administrator can invite new users and assign and/or change Admin privileges and default project roles. You can add as many users as you like as dictated by your license agreement.
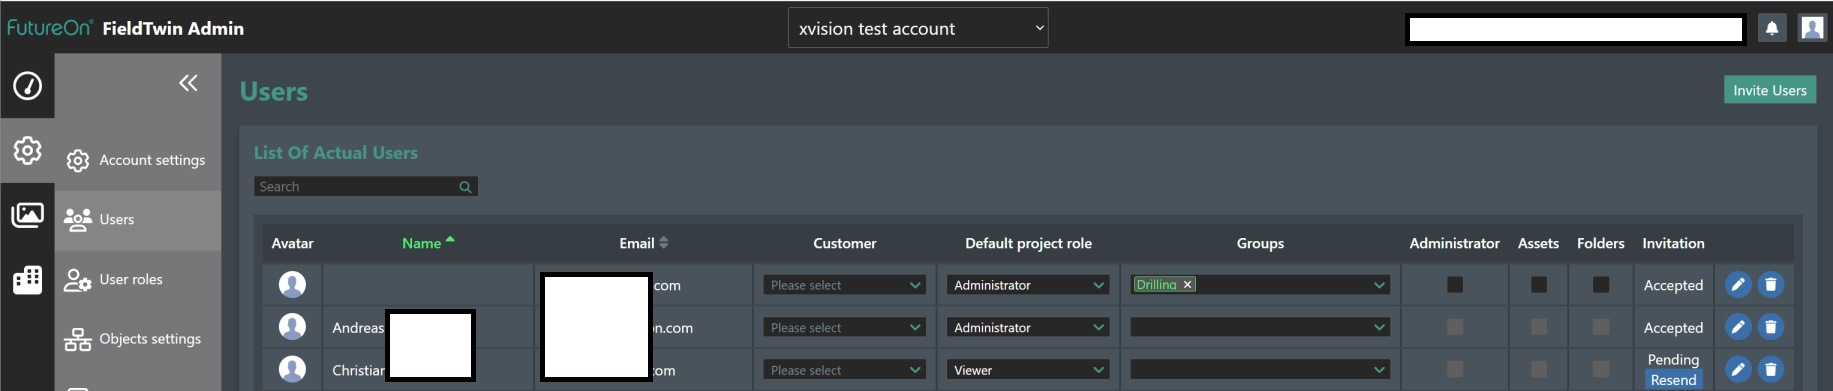
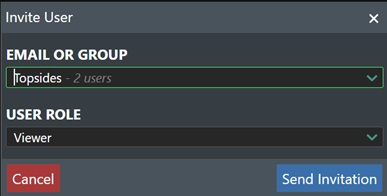
Inviting a new user - Click on the "Invite Users" button as shown above will display the following dialog:
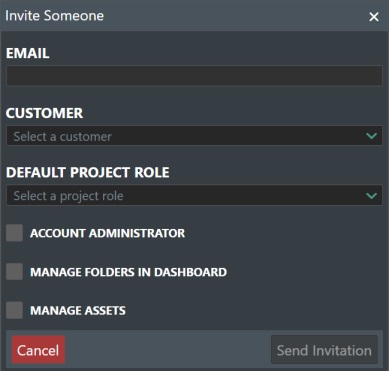
Email - Enter the email address of the person you wish to invite in the text field.
Customer - Select the customer name that this user should be linked to if that has been defined under the Input Configuration settings.
Default Project Role - Select the user role that the invited user should have e.g. Administrator, Editor, Viewer, or any of the roles defined under the User Roles settings.
Account Administrator - Check this box if the user should have Account Administrator privileges.
Manage Folders in Dashboard - Check this box is the user should be able to create, rename or delete folders in the tree-view.
Manage Assets - Check this box if the user should be able to mange assets.
Press the "Send Invitation" button to issue the invitation. Otherwise select "Cancel" to return without inviting anyone.
A user will be listed as pending until they click on the invite link in the email and save their user details. You can delete pending invitations and issue a new one by pressing the Resend button.
They will then receive an invite email:
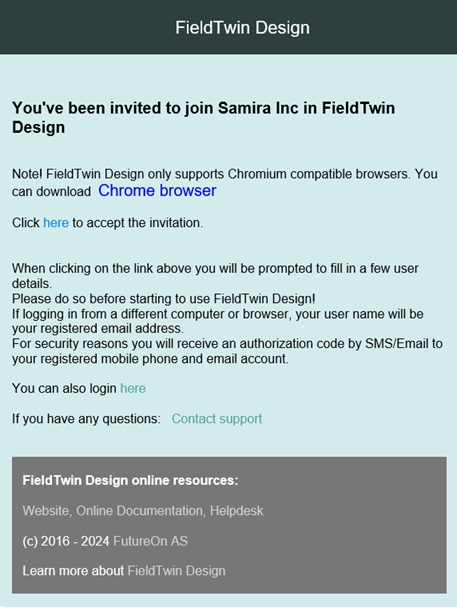
When the new user accepts the invitation by clicking the link in the invitation email the user needs to fill in some user information.
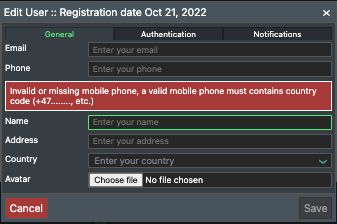
Note! The Phone field must be filled in with the user's mobile phone number as FieldTwin Design uses token based authentication as a security measure over SMS/Email, unless your account is set up for corporate SSO authentication, or you enable TOTP authentication. The mobile phone number must also be prefixed with the country code at present. The other fields are not required.
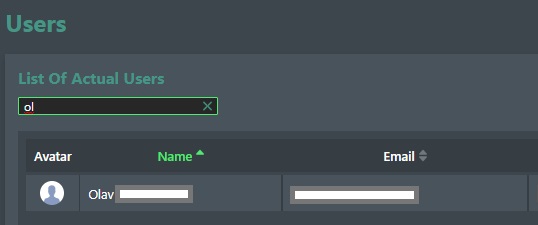
Search - You can use the free text search field under List of Actual Users to narrow down the user list. Simply start typing in names or email etc.
Each individual user entry has the following editable options available:

Customer - You can assign a customer entry to the user from the drop-down list if any have been defined under the Input Configuration settings.
Default Project Role - The system is configured by default with the following user roles; Administrator, Editor, and Viewer. If you have defined custom user roles, then these will appear in the drop-down list. For more information, please see the documentation on User Roles settings screen. Note! You need to assign users a default project role.
Groups - Assign the user to any predefined groups e.g. Drilling. You can create new Groups, by typing it into the Groups field as shown below:
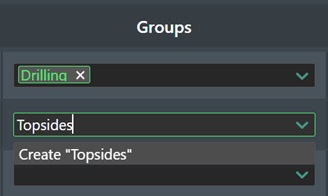
Then you can assign the users you want with this new group. And now when you are in Projec Settings > Users and select Invite User you can invite a Group instead of individuals.
Removing Group Users
If you later change members of a group that you have invited into specific project(s), please be aware that removing users from a group will NOT remove them from the project. This has to be done under Project Settings -> Users.
Administrator - To change the user account role between Account Administrator and User simply check the box in the Administrator column, and it will toggle the account administrator role between Yes or No.
Assets - Toggle this to Yes if the user should be able to select the Asset Settings under the asset library. Note! Only for Super Admins.
Folders - Check this box if the user should have access to folder management.
Invitation - Shows the invitation status. If Pending you can click on Resend to issue a new email invite.
Edit user information - Click on the Pencil icon to edit the user settings. This will then display the following dialog box for user info editing:
More information about the user settings can be found here
Delete user - Click on the Trash Can icon if you want to delete the user. A dialog will prompt you to confirm the action as it cannot be undone!